Minimal Excel Template Guide
Here’s a minimal Excel template guide formatted in HTML: “`html
Minimal Excel Template Guide
Introduction
Creating effective Excel templates doesn’t require complex formulas or intricate designs. A minimal template focuses on clarity, usability, and efficient data entry. This guide provides a step-by-step approach to building clean, functional templates.
Step 1: Define the Purpose and Scope
Before opening Excel, clearly define the template’s purpose. What data will it collect? Who will use it? How will the data be used later? For example, is it for tracking sales, managing inventory, or budgeting? Knowing the purpose will guide your design decisions.
Step 2: Plan the Data Structure
Plan how the data will be organized. Think about the columns you’ll need and the data types for each (e.g., text, numbers, dates). Aim for a tabular format with a clear header row. Consider these questions:
- What are the essential data fields?
- Will there be calculations based on this data?
- How will the data be sorted and filtered?
Step 3: Create the Header Row
The header row is crucial for understanding the template. Use descriptive and concise column headers. For example, instead of “Prod,” use “Product Name.” Use proper capitalization and consistent formatting. Consider using bold text for the headers for visual distinction.
Step 4: Implement Basic Formatting
Minimal formatting enhances readability without overwhelming the user. Here’s a simple approach:
- Font: Choose a clear, common font like Arial or Calibri, size 11 or 12.
- Alignment: Left-align text, right-align numbers, and center-align dates (generally).
- Borders: Use subtle borders to define cells and rows, particularly for the header and the data area. A thin gray border is often sufficient.
- Number Formatting: Apply appropriate number formats (e.g., currency, percentage, decimal places) to ensure consistency and accuracy. Use the Format Cells dialog box (Ctrl+1) for detailed control.
- Column Widths: Adjust column widths to comfortably fit the widest data entry. Double-clicking the right edge of a column header automatically adjusts the width.
Step 5: Add Data Validation (Optional but Recommended)
Data validation prevents errors and ensures data consistency. Use it to restrict the type of data entered into specific cells. To add data validation:
- Select the cells where you want to apply validation.
- Go to the “Data” tab and click “Data Validation.”
- Choose a validation rule (e.g., “List,” “Number,” “Date”).
- Define the criteria (e.g., a list of allowed values, a minimum and maximum number).
- Consider adding an “Input Message” to guide the user.
- Add an “Error Alert” to inform the user of invalid entries.
Step 6: Implement Basic Formulas (If Needed)
If the template requires calculations, use simple and clear formulas. Avoid overly complex nested formulas if possible. Use cell references (e.g., `=A2*B2`) to perform calculations based on data in other cells. Consider using named ranges to improve formula readability. For example, instead of `=SUM(A1:A10)`, you could name the range `A1:A10` as “Sales” and use `=SUM(Sales)`. Apply the formulas to the first data row, then drag the fill handle (the small square at the bottom-right corner of the cell) down to copy the formula to other rows.
Step 7: Protect the Template (Optional)
To prevent accidental changes to the template’s structure or formulas, you can protect it. To protect a sheet:
- Select the cells you want users to be able to edit.
- Press Ctrl+1 to open the Format Cells dialog box.
- Go to the “Protection” tab and uncheck “Locked.”
- Go to the “Review” tab and click “Protect Sheet.”
- Set a password (optional) and choose which actions users are allowed to perform (e.g., select locked cells, sort, filter).
Step 8: Test and Refine
Thoroughly test the template with sample data to identify any errors or usability issues. Ask colleagues or potential users to test it and provide feedback. Based on the feedback, refine the template to improve its functionality and user-friendliness.
Step 9: Save as a Template
To save the Excel file as a template so you can easily reuse it, go to “File” > “Save As” and choose “Excel Template (*.xltx)” as the file type. This will save the file in the default templates folder.
Example Template: Simple Sales Tracker
Here’s an example of a minimal sales tracking template:
| Date | Product Name | Quantity | Price per Unit | Total Revenue |
|---|---|---|---|---|
| (Enter Date) | (Enter Product Name) | (Enter Quantity) | (Enter Price) | `=[Quantity]*[Price per Unit]` (Formula) |
In this example, the `Total Revenue` column uses a simple formula to calculate the revenue based on quantity and price. Data validation could be added to the `Product Name` column to ensure consistency.
Conclusion
A minimal Excel template prioritizes clarity, usability, and data integrity. By following these steps, you can create effective templates that streamline data collection and analysis without unnecessary complexity.
“`
 1260×768 excel normal template excel templates excel templates from www.exceltemplate123.us
  1280×720 basic excel spreadsheet template spreadsheet downloa microsoft excel from db-excel.com
 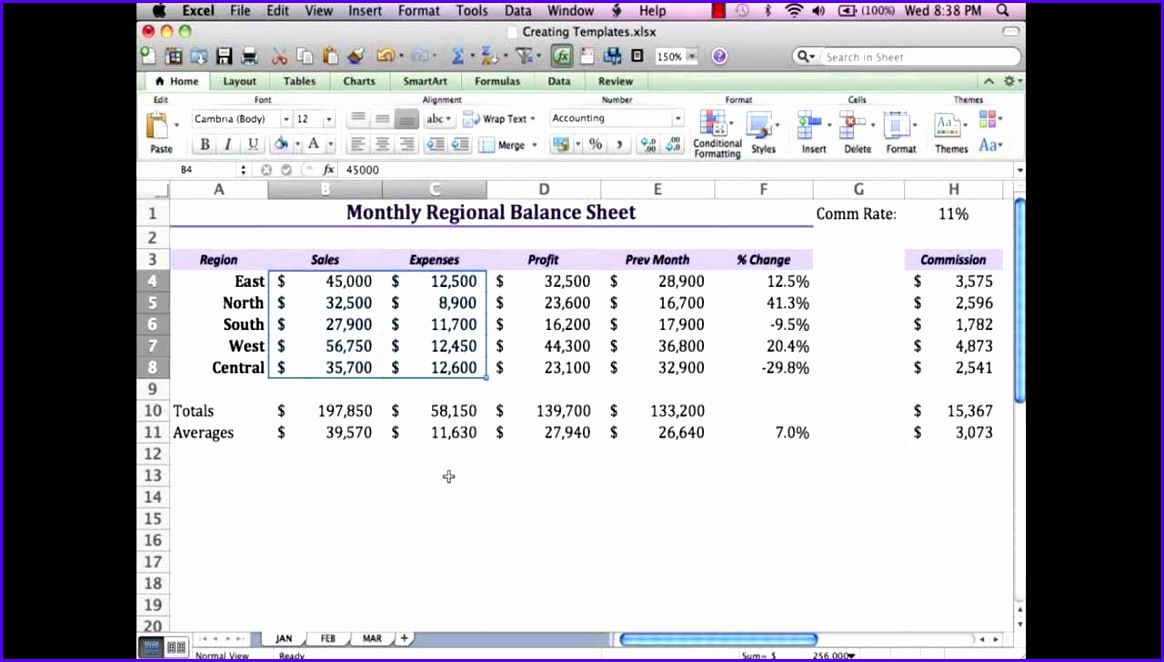 1164×662 excel templates mac excel templates excel templates from www.exceltemplate123.us
  1150×914 minimalist ms excel budget template spreadsheet etsy from www.etsy.com
 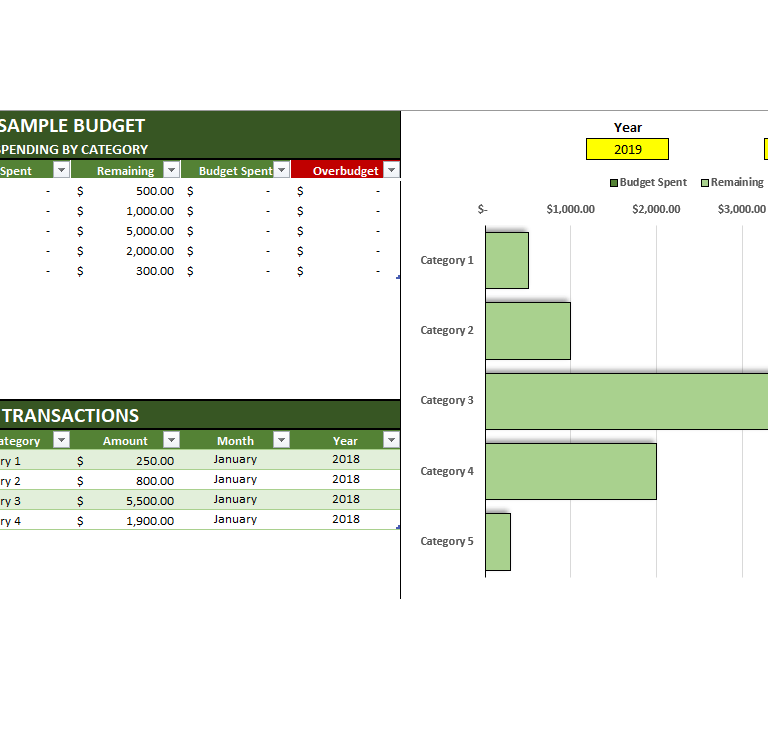 768×730 microsoft excel tutorials templates tips howtoexcelnet from howtoexcel.net
  1561×810 excel template archives hub blog from blog.archiveshub.jisc.ac.uk
  1280×720 advanced excel spreadsheet templates spreadsheet templates business from db-excel.com
 Thank you for visiting Minimal Excel Template Guide. There are a lot of beautiful templates out there, but it can be easy to feel like a lot of the best cost a ridiculous amount of money, require special design. And if at this time you are looking for information and ideas regarding the Minimal Excel Template Guide then, you are in the perfect place. Get this Minimal Excel Template Guide for free here. We hope this post Minimal Excel Template Guide inspired you and help you what you are looking for.
Minimal Excel Template Guide was posted in July 23, 2025 at 5:57 am. If you wanna have it as yours, please click the Pictures and you will go to click right mouse then Save Image As and Click Save and download the Minimal Excel Template Guide Picture.. Don’t forget to share this picture with others via Facebook, Twitter, Pinterest or other social medias! we do hope you'll get inspired by SampleTemplates123... Thanks again! If you have any DMCA issues on this post, please contact us!
Related For Minimal Excel Template Guide

AI Productivity Tools For Remote Wo
AI Productivity Tools for Remote Work AI Productivity ToolsWork From Home Daily Planner Templa
Work From Home Daily Planner Template: Your Key toPrintable Daily Habit Tracker PDF
Printable Daily Habit Tracker PDF: Your Key to Building