Organizing Your Pantry For Maximum Efficiency
Pantry Perfection: Organizing for Maximum Efficiency
A well-organized pantry isn’t just aesthetically pleasing; it’s a functional powerhouse that saves time, reduces food waste, and simplifies meal preparation. It’s an investment in your sanity and your budget. But where do you start? Transforming a chaotic pantry into an organized haven requires a strategic approach. Here’s a comprehensive guide to achieving maximum efficiency in your pantry:
Phase 1: The Great Purge and Deep Clean
Before you can organize, you need to declutter. This is arguably the most important step, so dedicate ample time to it.
1. Empty Everything
Yes, everything. Remove all items from your pantry shelves. This allows you to see the space you’re working with and provides a clean slate.
2. Inventory and Expiration Dates
As you remove items, check expiration dates. Be ruthless! Toss anything that’s expired, stale, or you know you’ll never use. This includes spices that have lost their potency, forgotten sauces, and that bag of dried beans you bought three years ago. Donating unopened, non-expired items is a great way to give back and reduce waste.
3. Assess and Group
Once you’ve purged the unwanted items, start grouping similar items together. Examples include:
- Canned goods (vegetables, beans, soups)
- Grains and pasta
- Baking supplies (flour, sugar, baking powder, chocolate chips)
- Snacks (chips, crackers, granola bars)
- Breakfast items (cereal, oatmeal, granola)
- Condiments and sauces
- Spices and herbs
- Bottled beverages
This grouping will form the basis of your organization system.
4. Thorough Cleaning
With the pantry empty, now’s the time for a deep clean. Vacuum up crumbs, wipe down shelves with a damp cloth and mild detergent, and consider using a natural cleaning solution like vinegar and water. Allow the shelves to dry completely before returning any items.
Phase 2: Planning and Strategizing Your Space
Now that your pantry is clean and you’ve inventoried your supplies, it’s time to plan the layout.
1. Analyze Your Pantry’s Architecture
Consider the existing structure of your pantry. Are the shelves adjustable? How deep are they? Are there any drawers or specialized storage areas? Understanding the layout is crucial for maximizing space.
2. Identify High-Demand Zones
Think about the items you use most frequently. These items should be placed in easily accessible locations, like at eye level or on lower shelves. Less frequently used items can be stored higher up or in the back of shelves.
3. Prioritize Functionality
The goal is efficiency. Organize your pantry based on how you cook and use food. For example, if you bake frequently, keep your baking supplies together. If you make smoothies every morning, keep your protein powder, nuts, and dried fruit readily available.
4. Consider Pantry Shelving and Accessories
Think about what kind of organization accessories you need. Common options include:
- Adjustable Shelves: Optimize vertical space by adjusting shelf heights to accommodate different sized items.
- Lazy Susans: Perfect for corners and hard-to-reach areas, allowing easy access to items.
- Shelf Risers: Create tiered storage on deeper shelves, making items at the back more visible.
- Can Organizers: Keep canned goods neatly stacked and easily accessible.
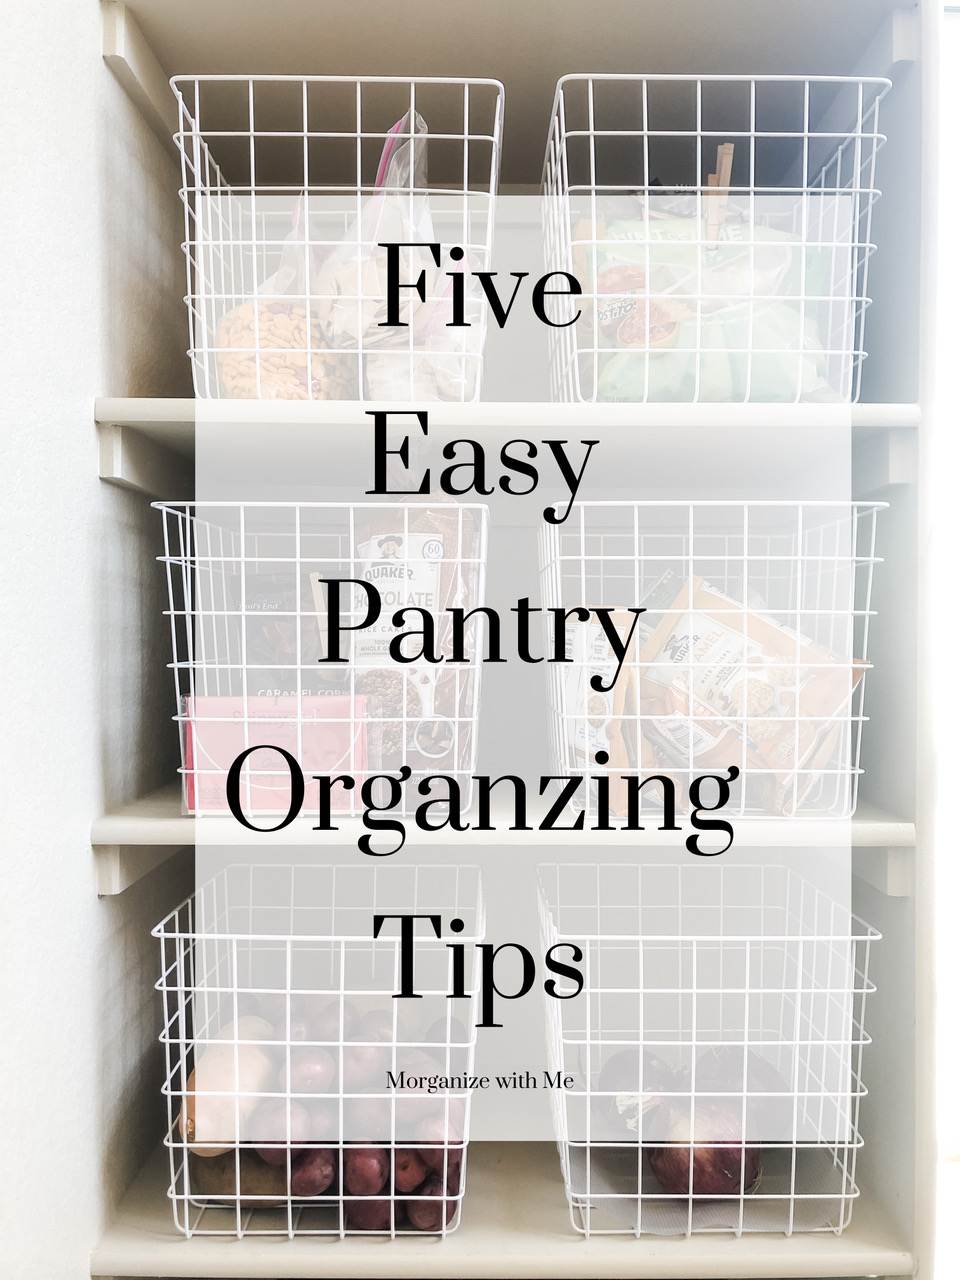
- Wire Baskets: Ideal for storing snacks, produce, or individually wrapped items.
- Clear Containers: Allow you to see what’s inside without having to open them, perfect for grains, pasta, and baking supplies.
- Door Organizers: Utilize the often-overlooked door space for spices, condiments, or small snacks.
- Food Storage Containers: Crucial for keeping opened packages fresh and preventing spills.
Phase 3: Implementing Your Organization System
With your plan in place, it’s time to put everything back into the pantry in an organized manner.
1. Zone by Category
Follow the groupings you created during the decluttering phase. Designate specific zones within your pantry for each category of food. This will help you quickly locate what you need.
2. Utilize Clear Containers
Transfer dry goods like flour, sugar, pasta, rice, and cereal into clear, airtight containers. This not only keeps food fresh but also makes it easier to see what you have and how much is left. Label each container clearly with the contents and expiration date (if applicable). Consider using stackable containers to maximize vertical space.
3. Leverage Vertical Space
Don’t let vertical space go to waste. Use shelf risers to create tiered storage and stackable bins to store items above each other. Install adjustable shelves if possible, allowing you to customize the height of each shelf to fit your needs.
4. Store Frequently Used Items Within Reach
Place items you use most often at eye level or on lower shelves where they’re easy to grab. This includes staples like cooking oil, salt, pepper, and your favorite snacks.
5. Group Items Within Zones
Within each zone, group items logically. For example, in the baking zone, group flour, sugar, baking powder, and chocolate chips together. In the snack zone, group chips, crackers, and granola bars together.
6. Label Everything
Labeling is key to maintaining an organized pantry. Use clear labels to identify the contents of containers, shelves, and bins. This will help you and anyone else using the pantry quickly find what they need and return it to its proper place.
7. Implement a FIFO System (First In, First Out)
When adding new items to the pantry, place them behind older items of the same type. This ensures that you use the older items first, preventing food waste.
8. Utilize Pantry Door Storage
Don’t forget the door! Install a door organizer to store spices, condiments, or small snacks. This is a great way to utilize otherwise wasted space.
Phase 4: Maintaining Your Organized Pantry
Organizing your pantry is a one-time effort. Maintenance is essential to keeping it tidy and efficient.
1. Regular Inventory Checks
Periodically check your pantry for expired or stale items. Toss anything that’s no longer good. This prevents food waste and ensures that you’re always using fresh ingredients.
2. Restock Strategically
Before going grocery shopping, check your pantry to see what you already have. This will help you avoid buying duplicates and prevent food waste.
3. Put Items Away Immediately
Make it a habit to put groceries away immediately after returning from the store. This prevents items from piling up on countertops and ensures that everything has a designated place in the pantry.
4. Clean Up Spills Promptly
Wipe up any spills or messes immediately to prevent sticky residue and attract pests.
5. Re-evaluate Your System Regularly
As your needs and habits change, your pantry organization system may need to be adjusted. Take some time every few months to re-evaluate your system and make any necessary changes.
Conclusion
Organizing your pantry for maximum efficiency is an ongoing process, but the benefits are well worth the effort. By following these steps, you can create a pantry that saves you time, reduces food waste, and simplifies meal preparation. A well-organized pantry is a key ingredient in a well-run kitchen and a happier, healthier home.
 960×1280 easy pantry organizing tips pantry size from orgjunkie.com
  600×696 pretty efficient ways organize pantry home life tips from www.homeandlifetips.com
  1200×1600 family prepared maximize pantry from myfamilyprepared.blogspot.com
  700×2000 maximize space pantry organized mom from www.organizedmom.net
  1192×1448 pantry perfection organized optimum performance central virginia from www.cvhomemag.com
 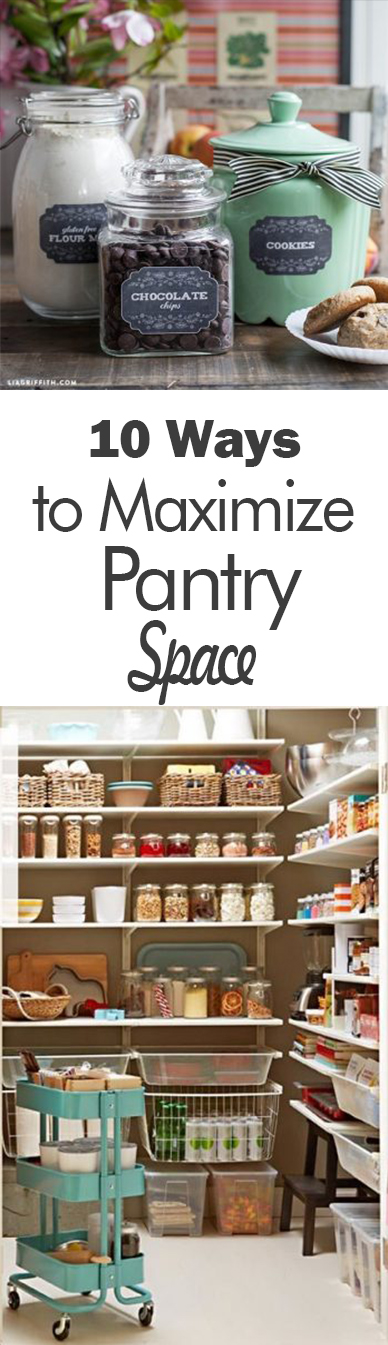 388×1345 ways maximize pantry space days organization from 101daysoforganization.org
 Thank you for visiting Organizing Your Pantry For Maximum Efficiency. There are a lot of beautiful templates out there, but it can be easy to feel like a lot of the best cost a ridiculous amount of money, require special design. And if at this time you are looking for information and ideas regarding the Organizing Your Pantry For Maximum Efficiency then, you are in the perfect place. Get this Organizing Your Pantry For Maximum Efficiency for free here. We hope this post Organizing Your Pantry For Maximum Efficiency inspired you and help you what you are looking for.
Organizing Your Pantry For Maximum Efficiency was posted in August 8, 2025 at 6:26 am. If you wanna have it as yours, please click the Pictures and you will go to click right mouse then Save Image As and Click Save and download the Organizing Your Pantry For Maximum Efficiency Picture.. Don’t forget to share this picture with others via Facebook, Twitter, Pinterest or other social medias! we do hope you'll get inspired by SampleTemplates123... Thanks again! If you have any DMCA issues on this post, please contact us!