How To Hang Wallpaper Without Bubbles
How to Hang Wallpaper Without Bubbles: A Comprehensive Guide
Hanging wallpaper can transform a room, adding personality and style. However, a common frustration for DIYers and even professionals is the appearance of unsightly bubbles. These air pockets can ruin the finished look and, if left unaddressed, may eventually lead to peeling. This guide provides a detailed, step-by-step approach to hanging wallpaper smoothly and bubble-free.
Preparation is Key: Setting the Stage for Success
Before you even think about wallpaper paste, meticulous preparation is essential. Skimping on this stage is a surefire way to invite bubbles and other problems.
1. Assess and Prepare the Walls:
- Cleanliness is paramount: Begin by thoroughly cleaning the walls. Remove any dust, dirt, grease, or cobwebs. Use a damp sponge and mild detergent to scrub the surface. Rinse with clean water and let it dry completely.
- Remove obstructions: Take down any outlet covers, switch plates, picture hooks, or nails. This will ensure a smooth surface for the wallpaper.
- Repair imperfections: Fill any holes, cracks, or dents with spackle or joint compound. Allow the filler to dry completely according to the manufacturer’s instructions, then sand it smooth. Uneven surfaces will create air pockets and visible imperfections under the wallpaper.
- Prime the walls: Applying a wallpaper primer is crucial, especially on porous surfaces like drywall or freshly painted walls. Primer seals the surface, creating a uniform texture and improving adhesion. It also allows for easier removal of the wallpaper in the future. Choose a primer specifically designed for wallpaper installation. Follow the primer’s instructions for application and drying time. Tinting the primer to a similar color as the wallpaper can also help hide seams.
- Wallpaper compatibility: Ensure the primer is compatible with the type of wallpaper you’re using. Some primers are better suited for non-woven wallpapers, while others work better with traditional paper-backed wallpapers.
2. Gather Your Tools and Materials:
Having the right tools on hand will make the process much smoother and more efficient.
- Wallpaper: Calculate the amount of wallpaper you need, adding extra for pattern matching and trimming. Purchase all the rolls from the same dye lot to ensure color consistency.
- Wallpaper paste: Choose a paste that is appropriate for the type of wallpaper you’re using. Pre-pasted wallpaper requires water activation, while other types need to be pasted manually.
- Wallpaper paste brush or roller: For applying paste evenly and efficiently.
- Paste table: A large, flat surface for applying paste and cutting the wallpaper. If you don’t have a paste table, you can use a clean, protected floor.
- Measuring tape: For accurate measurements of the wall and wallpaper.
- Pencil: For marking cutting lines.
- Straight edge or metal ruler: For guiding cuts.
- Utility knife or sharp scissors: For trimming the wallpaper.
- Plumb bob or level: For ensuring the first strip of wallpaper is perfectly vertical. This is crucial for a straight and even result.
- Smoothing brush or plastic smoother: For smoothing out the wallpaper and removing air bubbles. A plastic smoother is less likely to damage delicate wallpaper surfaces.
- Seam roller: For pressing the seams tightly together.
- Sponge and clean water: For wiping away excess paste.
- Drop cloth: To protect your floors.
- Step ladder: For reaching high areas.
3. Prepare the Wallpaper:
- Cutting the strips: Measure the height of your wall and add a few inches to the top and bottom for trimming. Cut the first strip of wallpaper to this length. If your wallpaper has a pattern, carefully match the pattern on the subsequent strips.
- Pattern matching: Take extra care when matching patterns. Misaligned patterns will be very noticeable and detract from the overall appearance.
- Numbering the strips: As you cut the strips, number them on the back in the order they will be applied. This will prevent confusion and ensure the pattern matches correctly.
The Application Process: Achieving a Bubble-Free Finish
With the preparation complete, it’s time to apply the wallpaper. This step requires patience and attention to detail.
1. Applying Paste (if applicable):
- Follow manufacturer’s instructions: Carefully read and follow the instructions on your wallpaper paste. Different pastes require different mixing ratios and application techniques.
- Even application: Apply the paste evenly to the back of the wallpaper strip, ensuring that all edges are covered. Avoid applying too much paste, as this can cause the wallpaper to stretch and bubble.
- Booking the wallpaper: After applying the paste, fold the pasted sides together, leaving the edges slightly offset. This is called “booking” the wallpaper. Booking allows the paste to soak into the paper, making it more pliable and easier to work with.
- Soaking time: Allow the wallpaper to soak for the recommended time, as specified by the manufacturer. This is crucial for proper adhesion.
2. Hanging the First Strip:
- Vertical alignment: Use a plumb bob or level to draw a vertical line on the wall, starting at the corner where you plan to hang the first strip. This line will serve as a guide to ensure the wallpaper is hung straight.
- Positioning the strip: Carefully unfold the top portion of the booked wallpaper and align it with the vertical line. Leave a small amount of excess at the top for trimming.
- Smoothing from the center: Use a smoothing brush or plastic smoother to smooth the wallpaper onto the wall, starting from the center and working outwards towards the edges. Apply even pressure to remove any air bubbles.
- Working out bubbles: If you encounter any bubbles, gently lift the wallpaper and smooth them out. Avoid stretching the wallpaper, as this can create new bubbles.
- Unfolding and smoothing the bottom: Unfold the bottom portion of the wallpaper and repeat the smoothing process.
- Trimming excess: Use a utility knife or sharp scissors to trim the excess wallpaper at the top and bottom, using a straight edge as a guide.
- Wiping excess paste: Use a damp sponge to wipe away any excess paste from the surface of the wallpaper.
3. Hanging Subsequent Strips:
- Matching the pattern: Carefully align the pattern on the second strip with the pattern on the first strip.
- Overlapping or butting seams: Depending on the type of wallpaper, you may need to overlap the seams slightly or butt them together tightly. Follow the manufacturer’s instructions for seam treatment.
- Seam roller: Use a seam roller to press the seams tightly together. This will help to prevent the seams from lifting and creating visible lines. Be careful not to over-roll the seams, as this can damage the wallpaper.
- Continue the process: Repeat the process for the remaining strips, taking care to match the pattern and smooth out any bubbles.
Troubleshooting Bubbles: What to Do When They Appear
Despite your best efforts, bubbles may still appear. Here’s how to deal with them:
- Small bubbles: Small bubbles may disappear on their own as the paste dries. However, if they persist, you can try gently smoothing them out with a smoothing brush or plastic smoother.
- Larger bubbles: For larger bubbles, use a utility knife or needle to make a small slit in the center of the bubble. Gently press out the air with a smoothing brush. Apply a small amount of paste under the slit if necessary and smooth the area again.
- Persistent bubbles: If bubbles continue to reappear, it may be due to inadequate surface preparation or poor paste application. In this case, you may need to remove the affected strip of wallpaper and start over.
Preventative Measures: Minimizing the Risk of Bubbles
Here are some additional tips to prevent bubbles from forming in the first place:
- Use the correct amount of paste: Applying too much or too little paste can both contribute to bubbles. Follow the manufacturer’s instructions carefully.
- Avoid stretching the wallpaper: Stretching the wallpaper can create air pockets and make it difficult to smooth out bubbles.
- Work quickly: Once the wallpaper is pasted, work quickly to apply it to the wall before the paste dries out.
- Maintain a consistent room temperature: Fluctuations in temperature can affect the drying time of the paste and contribute to bubbles.
- Ventilate the room: Good ventilation will help the paste dry evenly and prevent the formation of mold or mildew.
Hanging wallpaper without bubbles requires careful preparation, attention to detail, and the right tools. By following these steps and troubleshooting techniques, you can achieve a professional-looking, bubble-free finish that will transform your room.
 683×1024 hang art damaging wallpaper home ashley from athomewithashley.com
  783×440 hang wallpaper checking chelsea from checkinginwithchelsea.com
  1280×720 cool wallpaper hang lentine marine from lentinemarine.com
  640×853 hang unpasted wallpaper from uptodateinteriors.com
  600×906 hang wallpaper tutorial celebrating everyday life from celebratingeverydaylife.com
  745×745 hang wallpaper easy from www.fromhousetohome.com
  900×1350 hang pre pasted wallpaper sputnik style from www.hammerandaheadband.com
 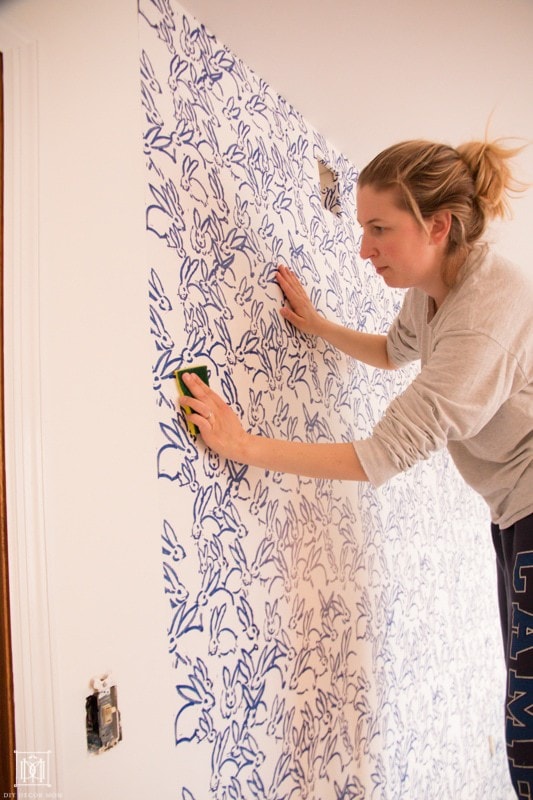 533×800 hang wallpaper diy decor mom from www.diydecormom.com
  768×1024 hang wallpaper happily from happilyeverafteretc.com
  1400×1867 hang pre pasted wallpaper tutorial beginners from theturquoisehome.com
  2000×1334 hang wallpaper step step guide society blog from blog.society6.com
 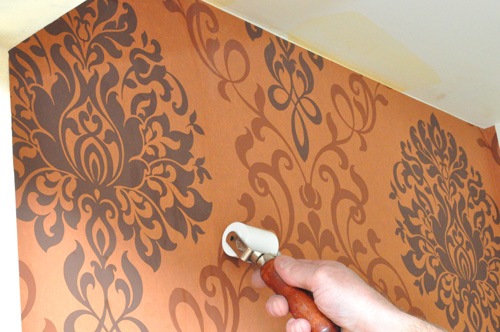 500×332 hang wallpaper from www.oneprojectcloser.com
 Thank you for visiting How To Hang Wallpaper Without Bubbles. There are a lot of beautiful templates out there, but it can be easy to feel like a lot of the best cost a ridiculous amount of money, require special design. And if at this time you are looking for information and ideas regarding the How To Hang Wallpaper Without Bubbles then, you are in the perfect place. Get this How To Hang Wallpaper Without Bubbles for free here. We hope this post How To Hang Wallpaper Without Bubbles inspired you and help you what you are looking for.
How To Hang Wallpaper Without Bubbles was posted in August 29, 2025 at 9:33 am. If you wanna have it as yours, please click the Pictures and you will go to click right mouse then Save Image As and Click Save and download the How To Hang Wallpaper Without Bubbles Picture.. Don’t forget to share this picture with others via Facebook, Twitter, Pinterest or other social medias! we do hope you'll get inspired by SampleTemplates123... Thanks again! If you have any DMCA issues on this post, please contact us!